
Bank Setup

Bank Setup
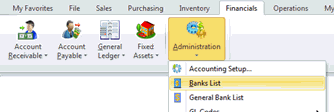
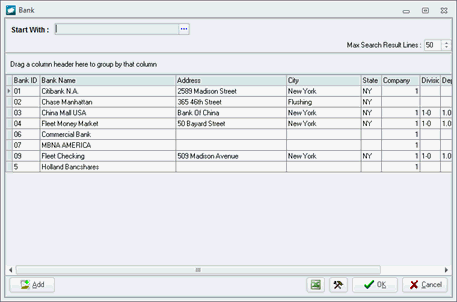
The system requires a bank to be set up in order to write checks and make deposits. Multiple accounts may be created for each bank; multiple checkbooks may be created for each account.

Contacts
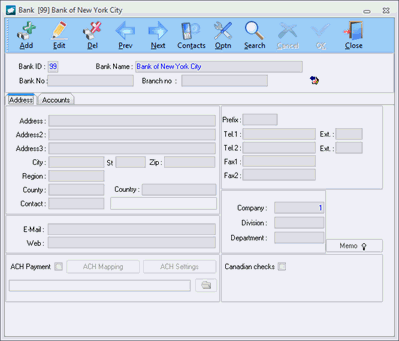
From the Banks
window toolbar, left-click the Contacts
button.

The Bank
Contact search window will appear. Left-click
the Add button.
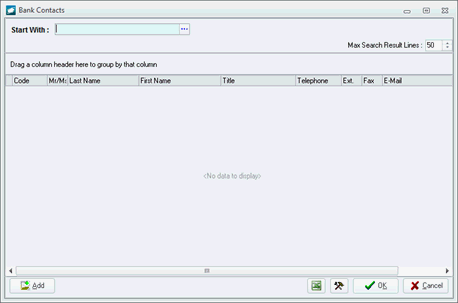
The Bank
Contacts List window will appear.
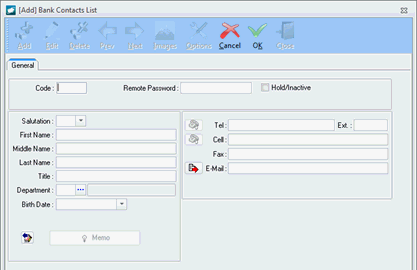
General tab
Code
field (mandatory) – Enter a code that is used internally
to your organization. [4-character limit]
NOTE: The
most common values used for the Code
field are consecutive whole numbers (with or without leading
zeros).
Remote Password field - Used to give the contact access to the SilverHawk E- Commerce module.
Hold/Inactive
flag – Mark the flag as “checked” to identify that the
contact is on hold or inactive.
NOTE: This field will also affect
SilverHawk E-Commerce module. If the Hold/Inactive
flag is marked as "checked", then the contact
account will be locked.
Note field – If the Hold/Inactive flag is marked as "checked", the Note field will appear. Identify the reason why the contact is on hold or inactive (optional). [30-character limit]
Salutation field – Select the salutation of the contact.
First Name field (mandatory) – Enter the first name of the contact. [25-character limit]
Middle Name field – Enter the middle name or initial of the contact. [10-character limit]
Last Name field – Enter the last name (or surname) of the contact. [25-character limit]
Title field – Enter the title of the contact. [30-character limit]
Department field – Select the department that the contact works in for the bank.
Birth Date field – Select the birth date of the contact.
Memo button – Left-click to open the Memo Editor window to save information related to the contact.
Tel and Ext fields – Enter the telephone number and the corresponding extension number for the contact.
Cell field – Enter the cellular telephone number for the contact.
Fax field – Enter the fax number for the contact.
E-Mail – Enter the e-mail address for the contact
Left-click the OK button on the Bank Contacts List window toolbar to save the contact record.
Left-click the Close button on the Bank Contacts List window toolbar to close the window.
Accounts
Multiple bank accounts may be created for each bank.
From the Bank
window, left-click the Accounts
tab.
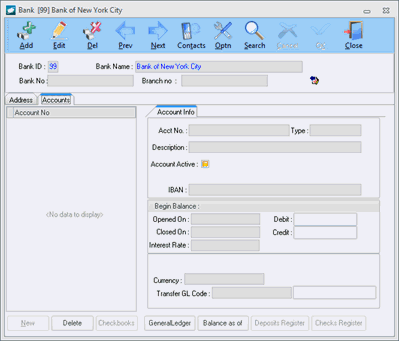
Left-click the Edit
button on the Bank
window toolbar to enter edit mode. Left-click
the New button.
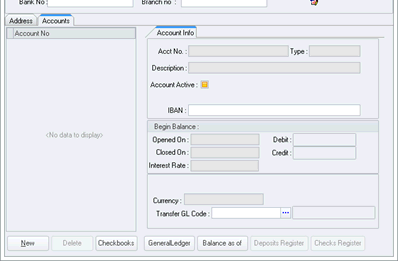
The Bank
Account window will appear.
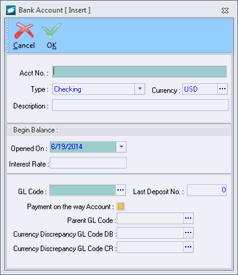
Header
Acct No field – Enter the bank account number.
Type field – Select the type of bank account.
Checking
Savings
Line of Credit
Investment Fund
Currency field – Select the currency in which funds are recorded in the bank account.
Description field – Enter a description for the bank account.
Begin Balance group box
Opened On field – Select the date the bank account was opened.
Interest Rate field – Enter the interest rate earned on the bank account.
General Ledger group box
GL Code field – Select the GL Code corresponding to the bank account.
Last
Deposit Number field – Enter the number associated
with the last deposit. This
field will set the counter for deposits associated with
this bank account to the value entered + 1.
The following fields are used in the separately licensed
Nederland Wire Payment Module. Instructions
for the completion of these fields are contained within
the manual for that module.
These fields may be ignored if that module is not licensed
to your organization:
Payment on the way Account flag –
Parent GL Code field –
Currency Discrepancy GL Code DB field –
Currency Discrepancy GL Code CR field –
Left-click the OK button on the Bank Account window toolbar to save the account record and close the window.
The bank account information will
appear on the Account
tab.
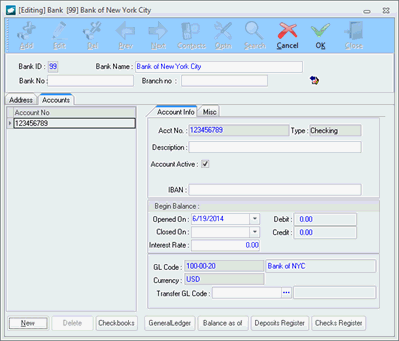
Account Info tab
Header group box
Acct No field – Displays the bank account number.
Type field – Displays the type of bank account.
Description field – Displays the description of the bank account.
Account Active flag – Mark the flag as “checked” if the account is active.
IBAN field – Enter the International Bank Account Number (if applicable)
Begin Balance group box
Opened On field – Select the date on which the bank account was opened.
Closed On field – If the bank account has been closed, select the date on which the bank account was closed.
Interest Rate field – Enter the interest rate earned on the bank account.
Debit field – Displays the debit balance of the bank account.
Credit field – Displays the credit balance of the bank account.
General Ledger group box
GL Code field – Displays the GL Code corresponding to the bank account.
Currency field – Displays the currency in which funds are recorded in the bank account.
Transfer GL Code field – Select the GL Code to post transfer transactions.
Misc
tab
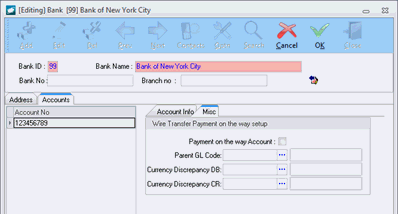
Wire Transfer Payment on the way setup group box - The fields within this group box are used in the separately licensed Nederland Wire Payment Module. Instructions for the completion of these fields are contained within the manual for that module.
Payment on the way Account flag –
Parent GL Code field –
Currency Discrepancy GL Code DB field –
Currency Discrepancy GL Code CR field –
Left-click the OK button on the Bank window toolbar to save the account record and exit “edit” mode.
Accounts tab buttons
GeneralLedger button – Left-click to view a list (all or filtered) of general ledger transactions associated with the bank account.
Balance as of button – Left-click to view the balance details of the bank account on a selected date.
Deposits Register button – Left-click to view a list of deposits associated with the bank account. Deposits document may be viewed from the list.
Checks Register button – Left-click to view a list of checks associated with the bank account. Checks may be viewed from the list.
Checkbooks
From the Bank
window, left-click the Accounts
tab and left-click the account for which a checkbook needs to
be created.
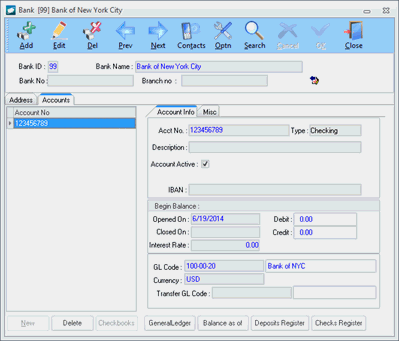
Left-click the Edit button on the Bank window toolbar to enter edit mode. Left-click the Checkbooks button.
The Check
Book List search window will appear. Left-click
the Add button.
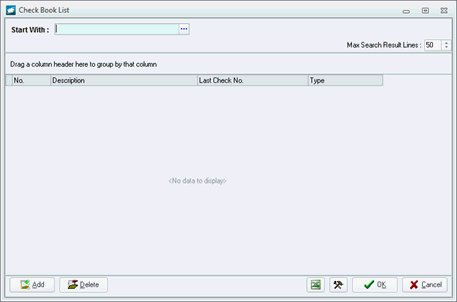
The Check
Books Setup window will appear.
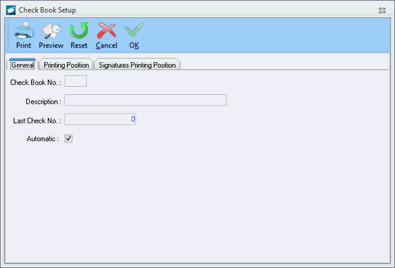
General tab
Check Book No field (mandatory) – Enter a check book number [2-character limit/numbers only], this code is for indexing purposes only.
Description field – Enter a description for the check book.
Last Check No field – Enter the number associated with the last check. This field will set the counter for checks associated with this check book to the value entered + 1.
Automatic flag – If the check book is computerized (checks print from the system) mark the flag as “checked”.
Printing
Position tab
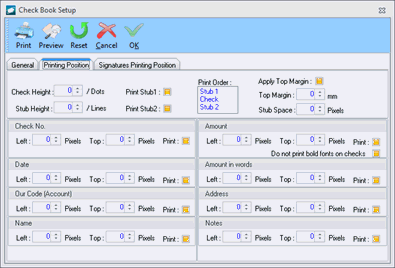
NOTE: Prior to completing the fields
on this tab, left-click the Reset
button on the Check
Book Setup window toolbar. This action will load industry
standard position values into each field.
Header
Check Height field – Enter the check height in terms of dots.
Stub Height field – Enter the number of lines that the stubs should display.
Print Stub1 flag – Mark the flag as “checked” to print the first copy of the stub.
Print Stub2 flag – Mark the flag as “checked” to print the second copy of the stub.
Print Order field – In general, checks printed from an electronic system will have 3 similar sized sections printed on normal letter sized (US) paper; one of those sections is the check and the other two are identical stubs (one for the payee and one for the payer). Identify the order (from top to bottom) that these sections should print.
Apply Top Margin flag – Mark the flag as “checked” to activate a margin at the top of the page equal to the value in the Top Margin field.
Top Margin field – Enter the margin that should be allowed at the top of the page in terms of millimeters.
Stub Space field – Enter the space that is allowed between each of the three sections in terms of pixels.
Check No group box
Left field – Identify the distance from the left margin that the check number should print.
Top field – Identify the distance from the top margin that the check number should print.
Print flag – Mark the flag as “checked” if the check number should print.
Date group box
Left field – Identify the distance from the left margin that the date should print.
Top field – Identify the distance from the top margin that the date should print.
Print flag – Mark the flag as “checked” if the date should print.
Our Code (Account) group box
Left field – Identify the distance from the left margin that your company information should print.
Top field – Identify the distance from the top margin that your company information should print.
Print flag – Mark the flag as “checked” if the company information should print.
Name group box
Left field – Identify the distance from the left margin that the payee name should print.
Top field – Identify the distance from the top margin that the payee name should print.
Print flag – Mark the flag as “checked” if the payee name should print.
Amount group box
Left field – Identify the distance from the left margin that the amount in numbers should print.
Top field – Identify the distance from the top margin that the amount in numbers should print.
Print flag – Mark the flag as “checked” if the amount in numbers should print.
Amount in words group box
Left field – Identify the distance from the left margin that the amount in words should print.
Top field – Identify the distance from the top margin that the amount in words should print.
Print flag – Mark the flag as “checked” if the amount in words should print.
Address group box
Left field – Identify the distance from the left margin that the payee address should print.
Top field – Identify the distance from the top margin that the payee address should print.
Print flag – Mark the flag as “checked” if the payee Address should print.
Notes group box
Left field – Identify the distance from the left margin that check notes should print.
Top field – Identify the distance from the top margin that the check notes should print.
Print flag – Mark the flag as “checked” if the check notes should print.
Signatures
Printing Position tab
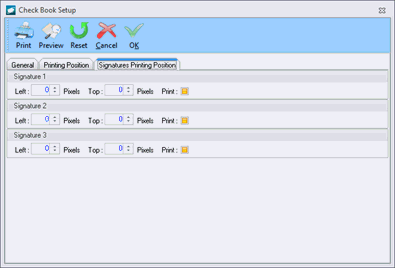
Signature 1 group box
Left field – Identify the distance from the left margin that an image of the first signature should print.
Top field – Identify the distance from the top margin that an image of the first signature should print.
Print flag – Mark the flag as “checked” if an image of the first signature should print.
Signature 2 group box
Left field – Identify the distance from the left margin that an image of the second signature should print.
Top field – Identify the distance from the top margin that an image of the second signature should print.
Print flag – Mark the flag as “checked” if an image of the second signature should print.
Signature 3 group box
Left field – Identify the distance from the left margin that an image of the third signature should print.
Top field – Identify the distance from the top margin that an image of the third signature should print.
Print flag – Mark the flag as “checked” if an image of the third signature should print.
Check
Book Setup window toolbar

Print button – Left-click to print a preview of a check using the settings on the Printing Position and Signatures Printing Position tabs.
Review button – Left-click to preview on the screen a check using the settings on the Printing Position and Signatures Printing Position tabs.
Reset button – Left-click to overwrite all existing values on the Printing Position and Signatures Printing Position tabs with the industry standard values.
Cancel button – Left-click to discard the changes made and close the Check Book Setup window.
OK button – Left-click to accept the changes made and close the Check Book Setup window.
|
AEROSPACE • DEFENSE • ELECTRONICS • POWER SYSTEMS • METALS• DEFENSE • ELECTRONICS • POWER SYSTEMS • METALS |
||
|
|
|
Bank Setup |