Purpose:
To describe the necessary administrative
setup required to utilize the parts builder module.
- Part Number Template Blocks
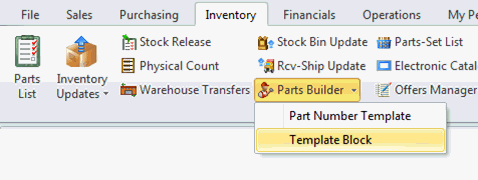
- From the ribbon, left-click Inventory,
left-click Parts Builder and
left-click .
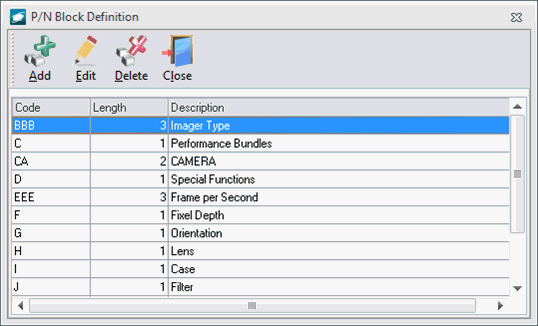
- The P/N Block
Definition window will appear. Left-click the
Add button.
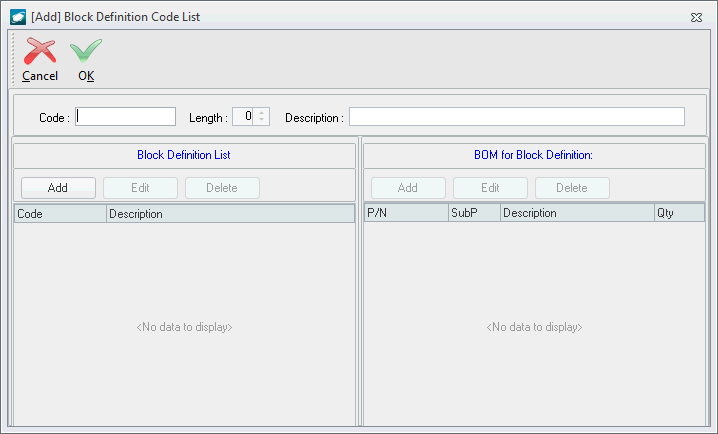
- The Block Definition
Code List window will appear.
- Header
- Code
field – Enter a code which is itself the length of the
block being created (i.e. if a block should be two characters
in length, acceptable codes would include “AA”, “BB”,
“AB”, etc)
- Length
field – Will display the length of the block being created
by counting the number of characters included in the Code field.
- Description
field – Enter the description of the block.
- Block
Definition List group box – Displays all possible values
for the block being created.
- Left-click the Add
button in the Block Definition
List group box.
- The Code
Template window will appear.
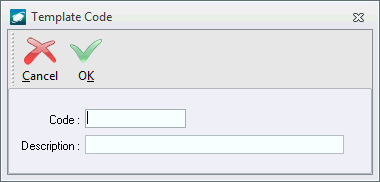
- Code
field – Enter a possible value of the block.
- Description
field (optional) – Enter a description of the value.
NOTE:
This description will be concatenated with
the other block values making up the part number (i.e.
if the part number is 01-34-T-7634 and the block value
descriptions are as follows:
“01” in the first block = Landing Gear
“34” in the second block = 737
“T” in the third block = Nose
“7634” in the fourth block = Model 7364
Then when this part number is created, the populated
description for the part master record will be “Landing
Gear, 737, Nose, Model 7364.” This description
may be modified in the parts master record; however,
we recommend that the block value descriptions be
identified in such a way that later modification is
not necessary.
- BOM for
Block Definition group box – Displays the bill of materials
that will be associated to the part master record if the block
value is included in the part number.
- Ensure the block value for which
the bill of materials is being created is highlighted
in the Block Definition List.

- Left-click the Add
button in the BOM(acronym) bill of materials
for Block Definition
group box.
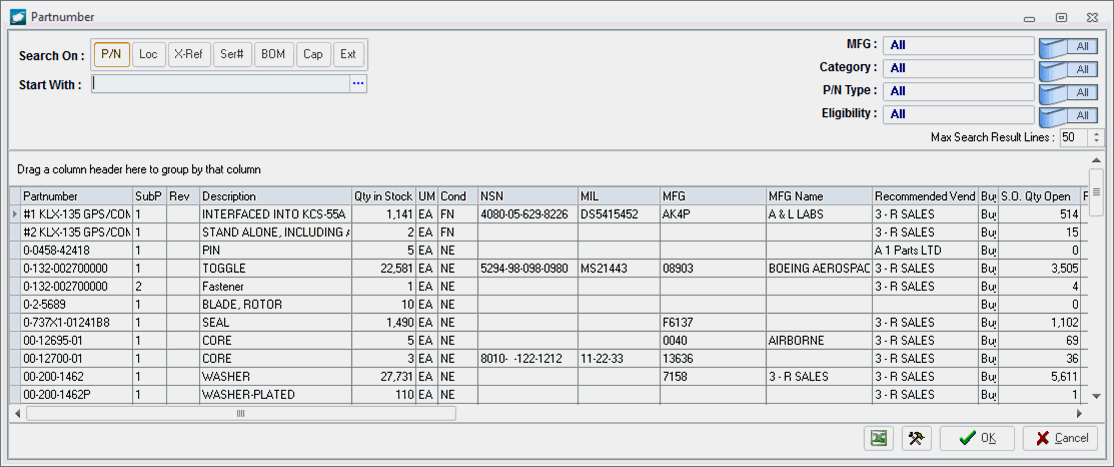
- The Partnumber
search window will appear. Select the part
number that should be added to the bill of materials for
the block value (left-click the line within the search
screen and left-click OK; or double-click the line within
the search screen).
- The Information
for window will appear.
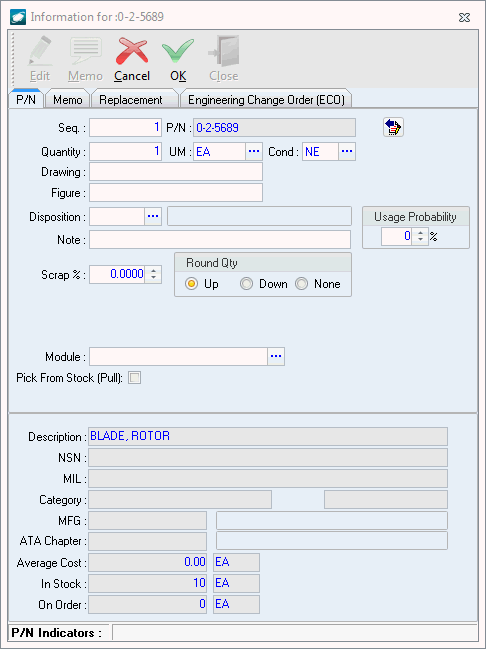
- P/N
tab
- Seq
(sequence) field – Displays the sequence number
on the current BOM. This number is
automatically populated using the next available
consecutive number but may be changed if required.
- P/N
field – Displays the part number that will be
added to the BOM.
- Quantity
field – Enter the quantity of the part number
that should be added to the BOM.
- UM
field – Select the unit of measure associated
with the quantity field.
- Cond
field – Select the desired condition of the part
that should be added to the BOM.
- Drawing
field – Enter a reference to the relevant assembly
drawing (if applicable).
- Figure
field – Enter a reference to the relevant assembly
figure (if applicable).
- Disposition
field – Select the disposition of the part(s)
when used in the relevant assembly.
- Note
field – Enter any applicable notes about the part.
- Usage
Probability field – Identify the percentage
probability that the part will be used in producing
the relevant assembly.
- Scrap
% field – Identify the percentage of the
quantity of the part number that is normally considered
scrap when producing the relevant assembly.
- Round
Qty group box
- Up
radio button – Select if the quantity should
be rounded up when scrap is calculated.
- Down
radio button – Select if the quantity should
be rounded down when scrap is calculated.
- None
radio button – Select if the quantity should
not be rounded when scrap is calculated.
- Module
field – (to be verified)
- Pick
From Stock (Pull) flag – Mark the flag
as “checked” identify that the part number will
be pulled from stock when producing the relevant
assembly.
- The lower section of
the window displays selected part master information
for the part number.
- Memo tab – Displays
information entered from the Memo button on
the Information for window toolbar.
NOTE: The
Information for window
must not be in “Edit” mode in order to create or modify
the memo.
- Replacement tab – Displays
a list of part numbers which may be used in the production
of the relevant assemblies.
NOTE: There
must exist Xref (cross reference) records in the system
in order to identify eligible parts on the Replacement
tab.
- Engineering
Change Order (ECO) tab - (to be verified)
- Left-click the Close
button to save the information and close the Information
for window.
- Left-click the OK
button on the Block Definition Code
List window toolbar to close the window.
- Left-click the Close
button on the P/N Block Definition
window toolbar to close the window.
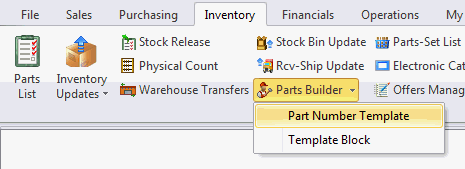
- Part Number Templates
- From the ribbon, left-click Inventory,
left-click Parts Builder and
left-click.
- The P/N Template
window will appear.
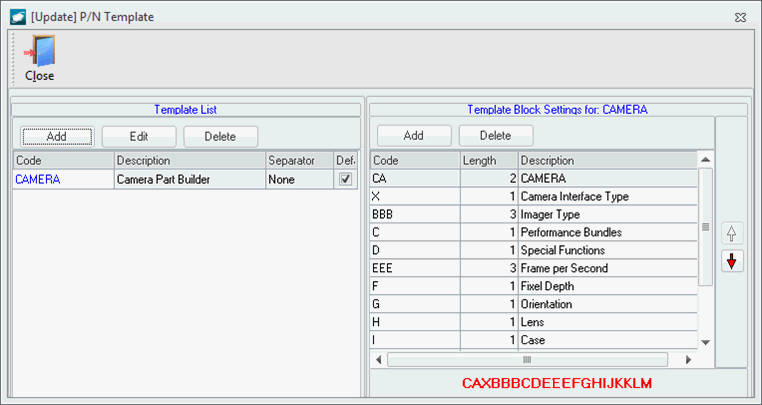
- Template
List group box – Displays the list of part number templates
that have been created.
- Left-click the Add
button in the Template List
group box.
- The P/N Template window
will appear.
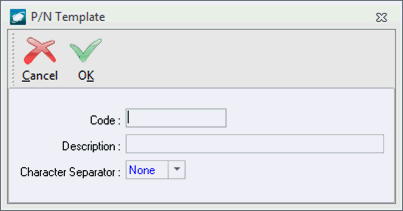
- Code
field – Enter a code for the part number template.
- Description
field – Enter a description for the part number template.
- Character
Separator field – Select the character (or
None) that should separate each template block in
the part number template.
- Left-click OK
on the P/N Template window
toolbar to save the record and close the window.
- The flag in the Default
column identifies the system default part number template.
- Template
Block Settings for group box – Displays the template
blocks used to build the part number template and the order
of those template blocks.
- Left-click the Add
button in the Template Block
Settings for group box.
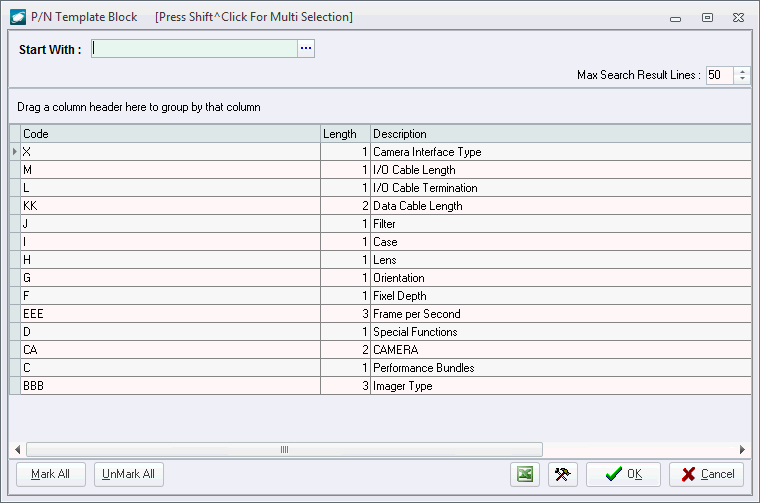
- The P/N
Template Block search window will appear. Select
the template block that should be added to the part number
template (left-click the line within the search screen
and left-click OK; or
double-click the line within the search screen).
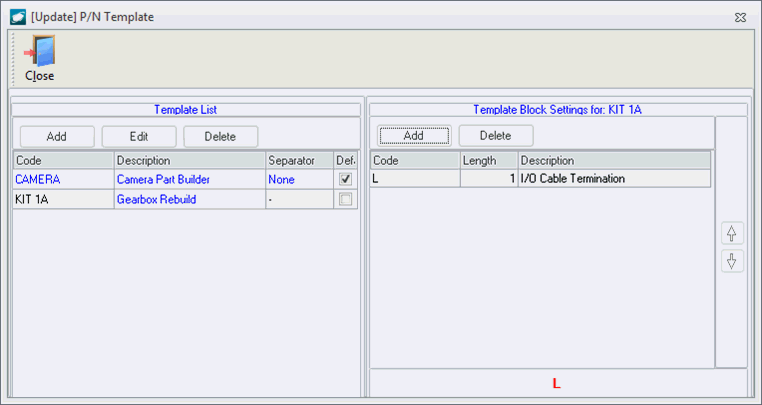
- The template block will be listed
and a preview of the part number template will be displayed
in the Template Block Settings
for group box.
- This process is repeated until
the entire part number format is built.
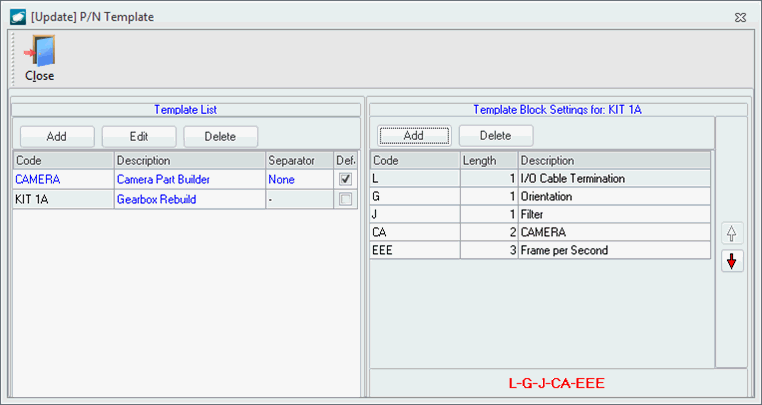
- The order of the template blocks
may be adjusted using the arrows on the right side of
the Template Block Settings
for group box.
- Left-click the Close button
on the P/N Template window toolbar to close the window.


