Purpose:
To
enter data relevant to the DD250(n) a form, officially referred to as 'DD Form 250', titled "Material Inspection and Receiving Report" which is managed by the US DoD
form.
There are three (3) documents in which DD250 information can be entered.
NOTE: If
the DD250 information is entered in one document, the information will
be automatically populated when the document is converted or processed;
however, if DD250 information is entered into converted documents, that
information will not be populated back to the parent document.
Access
- From the sales order:
- Left-click the Optn
(Option) button and a menu will appear.
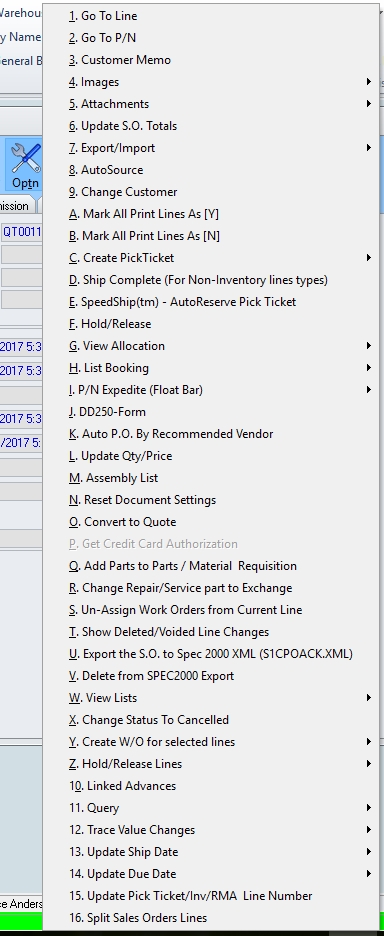
- Left-click and the DD250 SetUp
Screen window will appear (see Fields
section below).
- From the pick ticket:
- Left-click the Optn
(Option) button and a menu will appear.
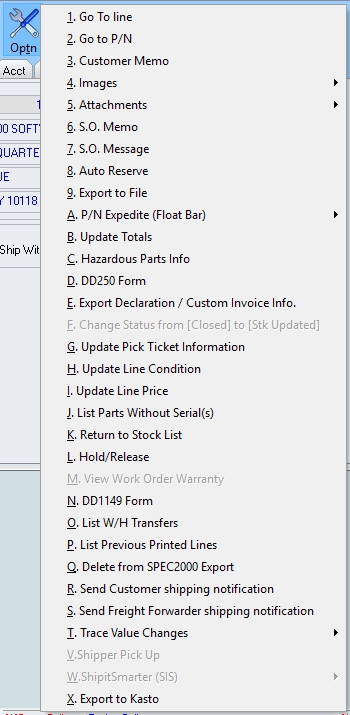
- Left-click and the DD250 SetUp
Screen window will appear (see Fields
section below).
- From the sales invoice:
- Left-click the Optn
(Option) button and a menu will appear.
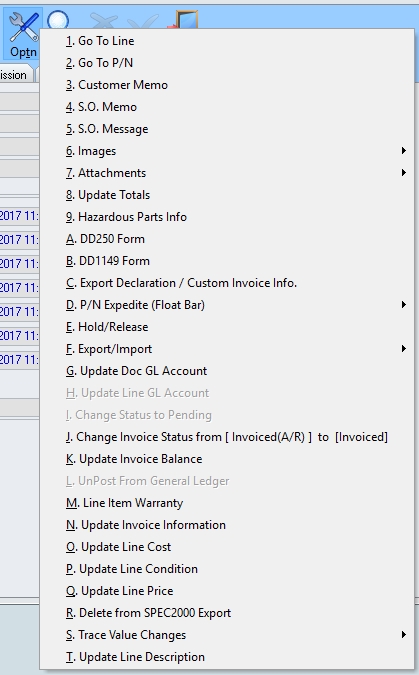
- Left-click and the DD250 SetUp
Screen window will appear (see Fields
section below).
Fields
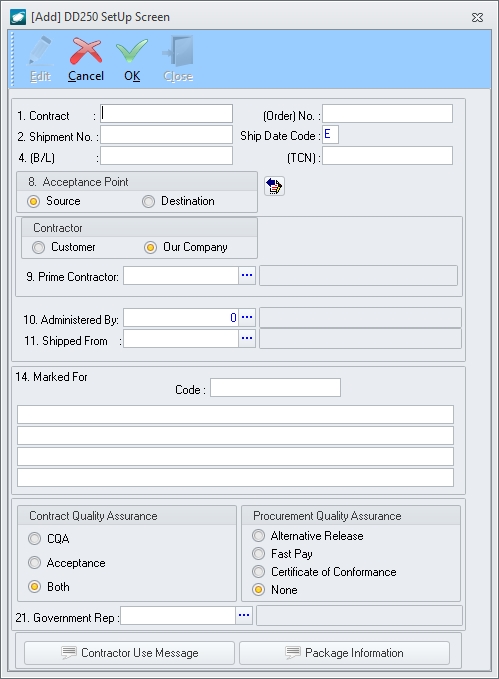
- Contract
field - Enter the information that should appear in Block
1 - PROCUREMENT INSTRUMENT IDENTIFICATION (CONTRACT) NO.
- Order field
- Enter the information that should appear in Block
1 - ORDER NO.
- Shipment No
field- Enter the information that should appear in Block
2 - SHIPMENT NO.
- Ship Date Code
field - Enter up to one character that will be printed just after
the date in Block 3 - DATE SHIPPED.
- (B/L) field
- Enter the information that should appear in Block
4 - B/L.
- (TCN) field
- Enter the information that should appear in Block
4 - TCN.
- Acceptance Point
group box(n) an area within the user interface that is bordered by a frame and may be labeled
- Select
the radio button
 to
the left of the Source label if
acceptance takes place at source.
to
the left of the Source label if
acceptance takes place at source.
- Select
the radio button to
the left of the Destination label
if acceptance takes place at destination.
- Contractor
group box
- Select the radio button to
the left of the Customer label
if your customer is the prime contractor (your company is the
subcontractor).
- Select the radio button to
the left of the Our Company label
if your company is the prime contractor.
- Prime Contractor
field
- If the Customer
radio button is
selected, left-click the ellipsis
 and
the Ship To List search window
will appear listing the ship
to address of the customer associated with the
document. The address to be printed in Block
9 - PRIME CONTRACTOR may be selected by double-clicking the applicable record or by highlighting the
applicable record and left-clicking the OK
button.
and
the Ship To List search window
will appear listing the ship
to address of the customer associated with the
document. The address to be printed in Block
9 - PRIME CONTRACTOR may be selected by double-clicking the applicable record or by highlighting the
applicable record and left-clicking the OK
button.
NOTE: CAGE
CODE - (to be verified)
- If the Our Company
radio button is
selected, left-click the ellipsis and
the Warehouse/Address List search
window will appear. The address to be printed in Block
9 - PRIME CONTRACTOR may be selected by double-clicking the applicable record or by highlighting the
applicable record and left-clicking the OK
button.
NOTE: The
value in the Code field on the
Warehouse tab of the selected warehouse
will be printed in Block 9 - CODE.
- Administered By
field - Left-click the ellipsis and
the Ship To List search window will
appear listing the ship to addresses of the customer associated with
the document. The address to be printed in Block
10 - ADMINISTRATED BY may be selected by double-clicking the applicable record or by highlighting the
applicable record and left-clicking the OK
button.
NOTE: CAGE
CODE - (to be verified)
- Shipped From
field - Left-click the ellipsis and
the Warehouse/Address List search
window will appear. The address to be printed in Block
11 - SHIPPED FROM may be selected by double-clicking the applicable record or by highlighting the
applicable record and left-clicking the OK
button.
NOTE: The
value in the Code field on the Warehouse tab of the selected warehouse will
be printed in Block 11 - CODE.
- Marked For
group box
- Four (4) unlabeled fields - Enter the
information that should appear in Block
14 - MARKED FOR.
- Code
field - Enter the CAGE Code that should appear in Block
14 - CODE.
- Contract Quality
Assurance group box
- Select the radio button to
the left of the CQA label if the
CQA block should be checked in
Block 21 - CONTRACT QUALITY ASSURANCE.
- Select the radio button to
the left of the Acceptance label
if the ACCEPTANCE block should
be checked in Block 21 - CONTRACT QUALITY
ASSURANCE.
- Select the radio button to
the left of the Both label if
both the CQA and ACCEPTANCE
blocks should be checked in Block 21 -
CONTRACT QUALITY ASSURANCE.
- Procurement Quality
Assurance group box
- Select the radio button to
the left of the Alternative Release
label if on an alternative release procedure is identified in
the contract. The words ALTERNATIVE RELEASE
PROCEDURE will be printed just above the appropriate signature
in Block 21 - CONTRACT QUALITY ASSURANCE.
- Select the radio button to
the left of the Fast Pay label
if government acceptance is not required due to execution of Fast
Pay procedures. The words FAST PAY
will be printed just above the appropriate signature in Block 21 - CONTRACT QUALITY ASSURANCE.
- Select the radio button to
the left of the Certificate of Conformance
label if exceptions are noted on Certificates of Conformance attached
to the DD250. The words CERTIFICATE OF
CONFORMANCE will be printed just above the appropriate
signature in Block 21 - CONTRACT QUALITY
ASSURANCE.
- Select the radio button to
the left of the None label (default)
to identify the DD250 will be utilized as the sole acceptance
document.
- Government Rep
field - Left-click the ellipsis and
the Users List search window will appear. The representative information
to be printed just below the appropriate signature in Block
21 - CONTRACT QUALITY ASSURANCE may be selected by double-clicking the applicable record or by highlighting the
applicable record and left-clicking the OK
button.
NOTE: Each
government representative for whom information is to be printed on
DD250 forms must be set up as a user as follows:
- Enter name in First
Name and Last Name in the
header of the user file.
- Enter address on Personal
Info tab of the user file. The Address1,
Address2, City,
State, and ZIP
fields will print on the form.
- Enter title in Title
field on Personal Info tab of the
user file.
- Enter the phone number in Tel
field on the Personal Info tab
of the user file.