Purpose:
To
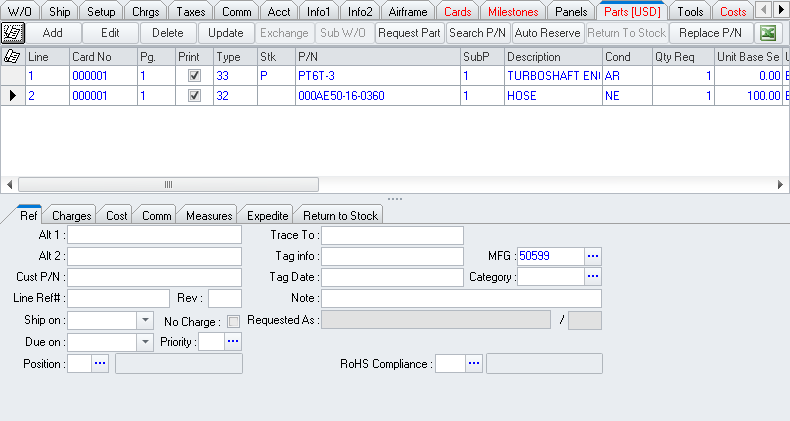
define the elements displayed on the Parts
tab of the Maintenance XL Work Order
window.

NOTE: The
label on the Parts tab will include the
code in brackets [] related to the currency in which information is expressed
on the tab.
Tab Tool Bar
Located across the upper portion of the tab.
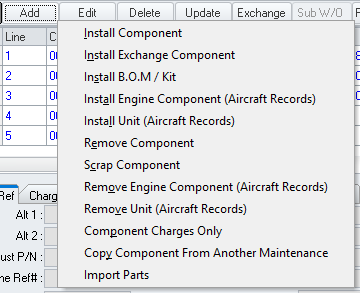
- Add button
- Left-click to display a menu that allows the user to add parts with
various line types and using various methods.

- Edit button
- Left-click to edit the part that is selected in the grid.
- Delete button
- Left-click to delete the part that is selected in the grid.
NOTE: The
delete function is only enabled when the MNT work order is in edit mode(adj) in any document, left-click the Edit button (most commonly located in the document window toolbar); after the button is selected "[Editing]" should appear in the document window title bar.
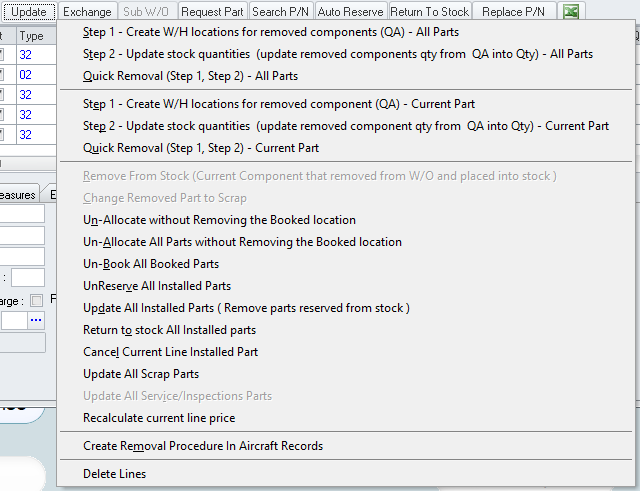
- Update button
- Left-click to display a menu that allows the user to perform various
functions affecting the status of the part that is selected in the
grid.

- Exchange
button - Left-click to convert a line type 32 or 33 to an exchange
part. This will convert the current line and add a line as necessary
to ensure there is an exchange line type and a core (line type 09)
line.
- Sub W/O
button - If active, left-click to open the sub work order that is
related to the part selected in the grid.
- Request Part
button - Left-click to display a menu that allows the user to send
requests to the parts / material requisition (PMR).

- Search P/N
button - Left-click to open the Maintenance
Card Parts search window which lists all parts on the MNT work
order.
- Auto Reserve
button - Left click to initiate the Auto
Reserve (link pending)
feature.
- Return To Stock
button - If active, left-click to return the part that is selected
in the grid back to the warehouse and location it was pulled from.
- Replace P/N
button - Left-click to replace the part number of the part selected
in the grid with a different part number.
 button -
Left-click to export the grid to a .csv file.
NOTE: The
columns will be exported to the .csv in the same order in which they
appear in the grid.
Grid
Located in the middle portion of the tab, just below the tab tool bar.
- Displays a row for each part associated with
the MNT work order.
- Column Grouping
- Column headers may be dragged into the area just above the grid
column headers in order to group results by that column (or set of
columns).
- Column Headers
- Identifies the field to which the values below that header belong.
Left-clicking a column header will result in the grid being sorted
by that column in ascending order. Left-clicking a second time on
the same column header will sort the grid by that column in descending
order.
- Filters
- A filter icon
 will appear on the right side of each column header when the mouse
pointer is hovered over the column header. Left-click to expand a
filter menu which will allow the user to filter results based upon
the particular column.
NOTE: If
a column is filtered, a grey filter icon  will
appear in the right portion of the column header.
- The width of each column may be adjusted
as necessary.
- The column order may be adjusted by dragging
the column header to another position within the grid. If a column
header is selected (by depressing the left button of the mouse) then
the mouse hovered over the other column headers, a set of green arrows
will appear identifying where the column will be repositioned when
the mouse button is released.
Part Detail Tabs Group Box
Located at the bottom of the tab, just below the grid.
NOTE: As
part lines are selected in the grid, applicable information displayed
on the part detail tabs.


 will appear on the right side of each column header when the mouse
pointer is hovered over the column header. Left-click to expand a
filter menu which will allow the user to filter results based upon
the particular column.
 will
appear in the right portion of the column header.